 This is often a tough one for those of us who have been in the sport, particularly road riding and racing, for a long time:
Lower pressure (to a point) is faster than rock solid. I started road riding and racing on 21's and 23's. I can remember seeking out Vredstein tires because even with a tube, they could be pumped up to 140 psi, as opposed to many other's topping out at 125 pounds per square inch (psi). During a stage race a couple decades ago, a friend let me borrow his disc wheel with a tubular. He said, "just check the tire pressure. " I replied, "How much? Like 125, 130?" He simply laughed and said "Not quite. Pump that sucker up to 180." One hundred eighty psi on a disc wheel with my aluminum bike! To say it was a bit of a harsh ride is an understatement. I don't fault my friend. At that time, it was readily accepted that harder was faster. While it's been accepted in the off-road world, particularly in 'cross, that lower and very specific tire pressure provides SIGNIFICANT advantages, the road world has been a little slower to adopt this mindset. This Fasttalk podcast with the master himself, Lennard Zinn, does a great job of explaining the concept of psi and how tire size, road/trail surface, rider mass, rider style, and other important factors need to be considered. https://www.fasttalklabs.com/fast-talk/lennard-zinn-and-the-art-of-tire-pressure/ I've posted this before, but this is a great tool to help you get a starting point: https://silca.cc/pages/sppc-form
0 Comments
There's not many people who have ridden a bike, from the youngest kid on their first bike to the most seasoned veteran, who hasn't dealt with a dirty, greasy, and possible noisy chain. Although some bike builders have experimented with a belt drive (quiet, clean, no lube required, lasts a long time but requires an internally geared hub to have gears), the chain drive bicycle is obviously far more common. I've certainly gotten less fastidious with my chain care over the years compared to my bachelor days, but I will run it through my chain cleaner and scrub it the best I can before a race or "when it looks like it needs it." While deep down I have always known this, there's more research showing that this is not a great approach and that I probably should be paying a bit more attention to my drivetrain. One of my wonderful clients, Eric, keyed me into this podcast by Dave Schell: https://www.kaizenendurance.coach/podcast/episode/4c33eee0/chain-lube-myth-busting-with-adam-kerin-of-zero-friction-cycling You may know Dave from his TrainingPeaks Podcasts as well. And I also came across this one from Dylan Johnson: https://youtu.be/Z8Hoi3Fs3Qc That really drives the point home. Eric is always willing to try new things and experiment, and went ahead and ordered a pre-waxed chain. Instead of me telling his story, he offered up to be the guest blogger for the week. Here's his tale: Wax It If You Got It The thought of chain wax seemed like more work than it was worth. Would the potential for less friction during a ride and less wear on parts be worth the deep cleaning of the chains, bathing them in hot wax, and the ongoing maintenance? I was not sold as it sounded like margin gains for a lot of effort, but I kept hearing it is clean; really really clean. I live in a condo and reducing the risk of smearing grease and grime had me intrigued because I seem to have this natural ability to get chain grease on stuff. My existing chain was near the end of its life so I ordered a pre waxed chain (see link below) to avoid the initial setup steps of cleaning a brand new chain. I removed the old chain and before installing the new pre-waxed chain I cleaned off my cassette and chain rings with some Muk Off degreaser. The waxed chain exceeded my expectations. A quick wipe with Xtri Bike Wipes post ride and it was like new. A few weeks of riding and the chain was still surprisingly clean. To extend the time between re-waxing I apply some Slica super secret (link below) which is wax based and a good for touch ups between full waxing. After month of riding I took the chain off and did my first waxing in the small crock pot I bought from amazon. I would likely get the slightly larger one but this still works fine: https://www.amazon.com/gp/product/B004P2LEE0/ref=ppx_yo_dt_b_asin_title_o00_s00?ie=UTF8&psc=1 The longest part of the waxing process was stringing the chain on the swisher which I bought with my wax but an old spoke or hanger can be bent into one. Once the chain is on the swisher, you then just put the chain on top of the wax and turn the pot to low. An hour later the chain was ready. Just swish it around and take it out to dry. I hung it dry overnight and put it back on the bike after loosening it little. I leave the wax in pot so it ready for the next chain as you can reuse it for a while before refreshing the wax, which is great for saving on wax and excellent for being lazy. At this point I am a full wax convert, so for my new bike I took the next step and cleaned the new factory waxed chain using a few baths in mineral spirits and a final clean in denatured alcohol. https://moltenspeedwax.com/pages/clean-your-chain and/or Zero Friction https://www.youtube.com/watch?v=l3CxiZqItGw I found cleaning a new chain easier than I thought. Note: a used chain is much harder to fully clean due to build up (or so I hear). I am not sure if it makes me any faster (BJL Coaching does that for me anyway), but the ride is smooth, the chain stays clean, and components will longer. Eric A. For those interested here are some links I found useful: Zero Friction is the best site I found for all things wax and chain lube. https://zerofrictioncycling.com.au They also have a YouTube channel and episode 4 cover waxing: https://www.youtube.com/watch?v=IptWWQP_MdA&t=32s YBN pre waxed Chain and master links: https://moltenspeedwax.com/collections/ybn-chains Molton Speed Wax https://moltenspeedwax.com/collections/molten-speed-wax Swisher Tool and chain pliers https://moltenspeedwax.com/collections/tools-miscellaneous Micro Fiber Towels: https://www.amazon.com/gp/product/B08BR5CY3D/ref=ppx_yo_dt_b_search_asin_title?ie=UTF8&th=1 Super Silca waxed based chain lube for quick touch ups: https://silca.cc/products/silca-super-secret-chain-lube Back to B.L.
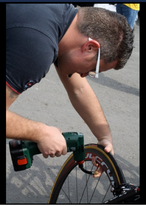
Eric and I pre-ride a mountain bike course in dry but dusty conditions just this past weekend. I was showing him the loop so he was behind me most of the time riding through my dust. We got done with the 6 mile loop and I looked at his chain...SHINY. And then he said, "watch this," and ran his fingers on the chain. No grease at all. So this is all very intriguing to me. At the very least, I'll do a better job keeping my chain clean and using some high quality lube. But maybe I'll but out that old crock pot and go for the full wax! Thanks again, Eric! Cheers, Coach Brian 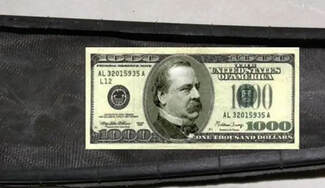 What can you get for a dollar these days? Not much, but it can save your ride if you tear your tire.
If you've been in the sport long enough, you've probably been on a ride where you or someone else gets a slice in their tire. Even if they're running tubeless with sealant, sometimes it's too large to get sealed. And while the tubeless tire plugs are awesome, sometimes it's not pluggable, too. Time to put in a new tube, but first we must bandage up that cut. Commonly known as a "tire boot", the idea is to take something and line the inside of the tire where the gash is located so that the fresh tube isn't exposed to the road or trail, which would inevitably lead to another burst tube. Many decades ago I had read in some cycling magazine about using a dollar (or any paper money) to act as a tire boot. While you can also use bar or gel wrappers, duct tape, or bits of trash you find on the side of the road (I actually did this with a buddy a long time ago), a bill works great. There are also official tire boots you can purchase, which are certainly not a bad idea to have in your pack. But if you don't, chances are you have a couple of dollars stashed in your tool kit or seat pack for those emergency stops at the gas station that doesn't take credit cards for purchases less than $10. And if you don't have some bills in there, make that happen. After you have access to the inside of the tire and the old tube (if applicable) has been removed AND you've swept the inside of the tire to make sure there's not other sharp debris in there, it's time to put in the boot. I've read about wrapping the bill around the tube, but I've always just lined the tire where the gash is located. I will usually fold it so it's at least two-ply for more protection. Making sure the boot doesn't move while installing the new tube, I carefully then reinstall the tire completely. Look to see that you haven't pinched then tube by squeezing the bead together inside the rim (you shouldn't see any tube sticking out) and then CAREFULLY and SLOWLY re-inflate your tire to 20-30 psi. Take a look to insure the tube isn't poking out of the cut and then re-inflate to riding pressure, reinstall your wheel, check your brakes, and you're off! I've had to use tire boots more than once, and it's always interesting to me what they look like when you pull them out. Yes, remove and discard the tire as riding with a cut in your tire, even booted, is not a great way to continue and can be dangerous.. I remember using a five dollar bill once and I had many miles to go. When I removed it after the ride, it was super compressed and really smooth from being jammed in there with the 120 psi we used to run back in the day. The five bucks went back in my pack and I was ready for the next adventure! Have any tips or tricks? Shoot me an e-mail or leave a comment below. Keep on riding! Coach Brian Your shorts legs...a great place to store food and trash!While personally I’ve tried to get away from gels, blocks, and bars as much as possible, those fast acting, easily accessible foods are sometimes the best solution for me. This is particularly true in a very hard training ride or a race. I’ve always been a fan of putting several of my gels just up my short leg. You can also leave just the tab of the gel poking out for an easy grab. I find this location faster to grab than reaching in my jersey pocket. It also frees up space in your pockets for other foods or supplies during the longer events.
Our short legs are also great places to store trash until you can dispose of it properly. Do take care to fold the wrapper kind of flat or it can poke you in the leg, which is less than enjoyable. Have a tip of your own? I’d love to hear about it! Post a comment below or send me an e-mail. Coach Brian  It's almost impossible to be a part of the cycling multi-verse and not have heard the term "marginal gains." This term was made popular in 2015 by the commentators of many big bike races, most notably Le Tour de France, as they discussed Team Sky's approach of making sure every detail was taken care of. According to CNBC,
"Sir Dave Brailsford, former performance director of British Cycling, revolutionized the sport using the theory of marginal gains.... As this thinking became a culture and a philosophy shared by all members of Brailsford’s team, they kept searching for any and every area where they could make tiny improvements. Their goal was a marginal or 1% gain in every aspect of their training and environment. Individually, each incremental change may have seemed unnecessary or random, but collectively, they helped create a powerhouse with a level of success that became the envy of the cycling world." Well, this post is certainly about something relatively easy and "small" that we all can do, but its impact might not be so marginal. I'm referring to making sure that, as we head out for 30 minute quick ride or an all day adventure, we put on that sunscreen and/or protective layers. On a very surface (no pun intended) level, getting sun burnt just hurts. It's uncomfortable, can make sleeping tough, and generally make you feel more tired than you are. From a performance standpoint, if your body is using significant resources to repair damaged skin, and then those resources are not available to repair your body from the effects of training. Sun burn is a form of inflammation, something we typically want to minimize. Continuing along the lines of performance, if the burn is uncomfortable enough to disrupt sleep, you have now robbed your body of that most crucial time of repair and adaptations. The poor sleep can also negatively impact your next training session, and the snowball effect continues. But the most important consideration is the long term damage that sun burn does to our skin, which can lead to much more serious implications down the road. From the MD Anderson Cancer Center: "How your skin changes during a sunburn When ultraviolet radiation from the sun reaches the skin, it damages the skin cells and causes mutations in their DNA. “Our bodies have a lot of amazing mechanisms to prevent and even correct these mutations,” George says. “But if the skin cells get more UV exposure than they can handle, the damage may be beyond repair, and the cells die off. Blood vessels dilate to increase blood flow and bring immune cells to the skin to help clean up the mess. All this causes the redness, swelling and inflammation we associate with a sunburn.” The sunburn will eventually heal, but some of the surviving cells will have mutations that escape repair. These cells could eventually become cancerous. Can you reverse sun damage? Some beauty products claim they can reverse sun damage or even stimulate cell repair. But no research has shown that any topical skin care product or lotion can reverse sun damage. “There’s no simple way to undo sun damage yet,” George says. “But there are lots of simple ways to prevent it by being sun-safe and avoiding sunburns.”" So that's the key right there: prevention. I am much more careful now than I was in the past, using both chemical and mechanical forms of sun protection. I got these arm skins (arm coolers) from Champion Systems pictured to the left a couple of summers ago and love them for their speed and effectiveness. Speed? Yes, much faster than applying sunscreen to my arms for a sunny jaunt on my bike. Are they hot? No, I'm not going to say they're "cool", but up to mid 80's they don't bother me too much. There's lighter options and colors out there, too. They make them for your knees and full legs, too. Do watch with your kit. Some jerseys these days are almost see-through and don't provide much of a Ultraviolet Protection Factor (UPF). In addition to my clothing, I hit the sunscreen religiously now. Most on the time I use the goopy zinc based stuff, but I figure if I'm going for it, I probably should use something healthy and decent. For those super long days out in the sun, I'll even throw a small tube or stick in my pocket and re-apply. I know, I know. It's just one more thing as you're trying to get out the door for your 60 minute lunch ride or squeezing in 75 minutes before that next client meeting. But the 5 minutes you take to protect your skin, can turn into hours and hours saved by not having to go to the dermatologist. And that of course can transition from an inconvenience to a serious problem very quickly. Here are some good articles with sunscreen options, how and when to apply, as well as more information and tips: https://www.bicycling.com/bikes-gear/g20005485/the-best-sunscreens-for-cyclists/#:~:text=Goldman%20suggests%20applying%20sunscreen%20to,a%20long%20period%20of%20time https://www.skincancer.org/blog/cycling-and-sun-protection/ https://www.theproscloset.com/blogs/news/cycling-sunscreen-and-sun-sleeves And this podcast really only touches on the issue, but if you've been in the mountain bike world for a while like I have, it might really hit home with you, too. Travis Brown was one of the mountain bike superstars from the 90's into 2000's, and to hear him talk about his scare with cancer was very, very real: Colby Pearce on Fasttalk So let's all take care of our largest organ so we can keep riding our bikes and enjoying other out of door activities for the rest of our lives. As a coach, I want to foster life-long cyclists so let's all stay healthy. There are so many options now with sprays, creams, sticks, etc. that we really don't have an excuse. Do it for yourself, do it for your loved ones, and, at the very least, do it for performance. Cheers, Coach Brian |
Categories
All
Coach B.L.Coach B.L. is the head coach at BJL Coaching and an avid racer and cycling enthusiast himself. Archives
April 2024
|
 RSS Feed